Strava is more than just a platform for tracking your runs and rides; it’s a social network for athletes. One key feature that many users overlook is the ability to add your running shoes to your profile. Tracking your footwear can help you monitor your mileage and ensure you’re getting the best performance from your favorite kicks. In this guide, we’ll explore how to add shoes to Strava, share personal experiences, and provide tips to enhance your running experience.
Why You Should Add Shoes to Strava
Adding shoes to your Strava account not only helps you keep tabs on how many miles you’ve logged in each pair but also contributes to injury prevention and performance optimization. Here’s why you should consider it:
1. Track Your Shoe Mileage
Each running shoe has a lifespan, typically ranging from 300 to 500 miles depending on the shoe type and your running style. By adding your shoes to Strava, you can set mileage alerts to remind you when it’s time to retire a pair. This practice can significantly reduce the risk of injuries caused by worn-out shoes. Studies indicate that proper shoe rotation can reduce injury risk by up to 30% (source: NCBI).
2. Monitor Performance Trends
By consistently logging your runs with specific shoes, you can correlate your performance metrics with your footwear. This can lead you to discover which shoes facilitate better results, whether it’s faster times or less fatigue. You might find that a lighter pair enhances speed, while a more cushioned shoe aids recovery on long runs.
3. Make Informed Purchases
After tracking the mileage and performance of your shoes, when it’s time to buy new ones, you’ll have valuable insights on what works best for you. This can help you avoid impulse purchases and make informed decisions based on data and personal experiences.


How to Add Shoes to Strava: Step-by-Step Guide
Now that you understand the benefits, let’s get into the nitty-gritty of adding shoes to your Strava account.
Step 1: Log Into Your Strava Account
Begin by logging into your Strava account through the app or website. If you haven’t created an account yet, you can sign up for free.
Step 2: Access the Shoe Settings
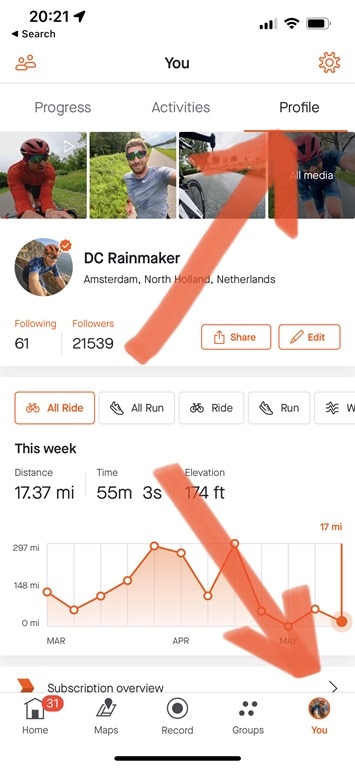
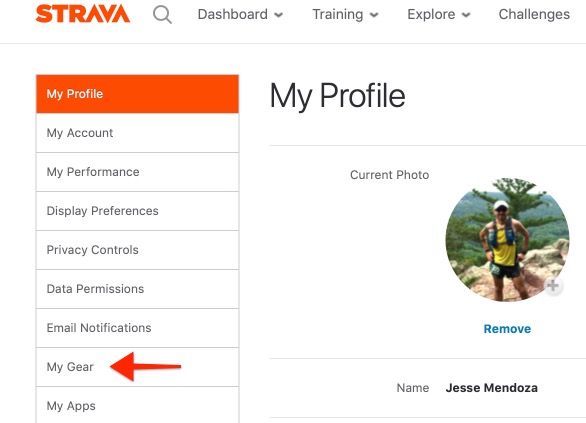
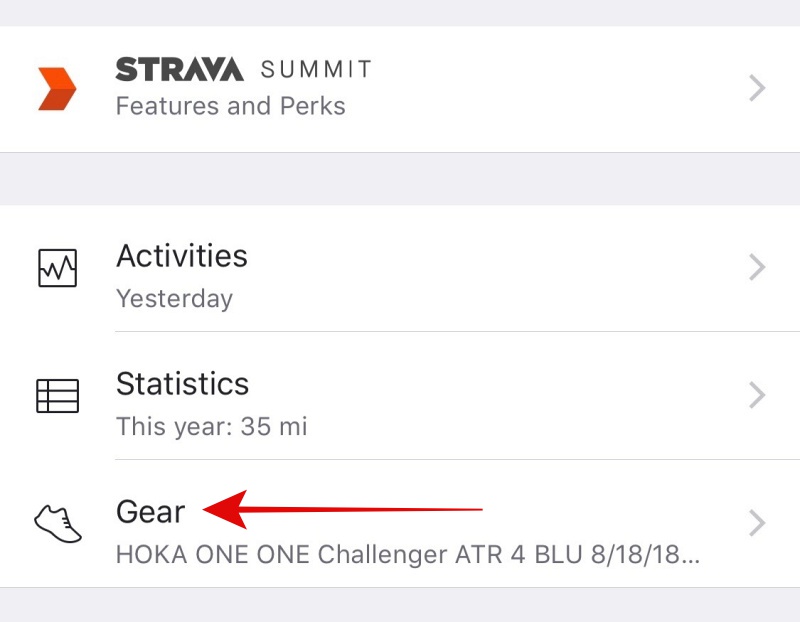
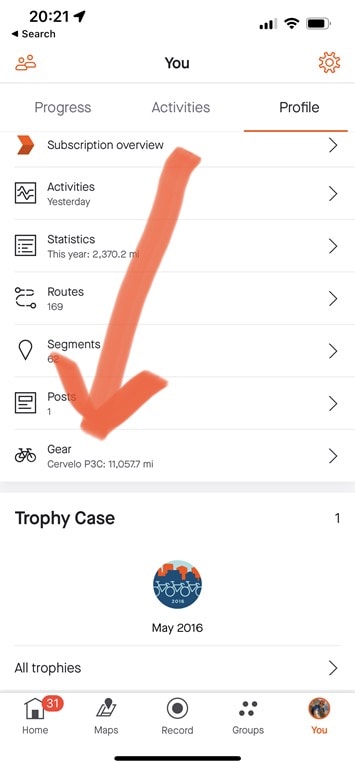
Navigate to your profile by clicking on your avatar or the ‘Profile’ tab. Scroll down to find the ‘Equipment’ section. Here, you’ll see options to manage your gear, including shoes.
Step 3: Add New Shoes
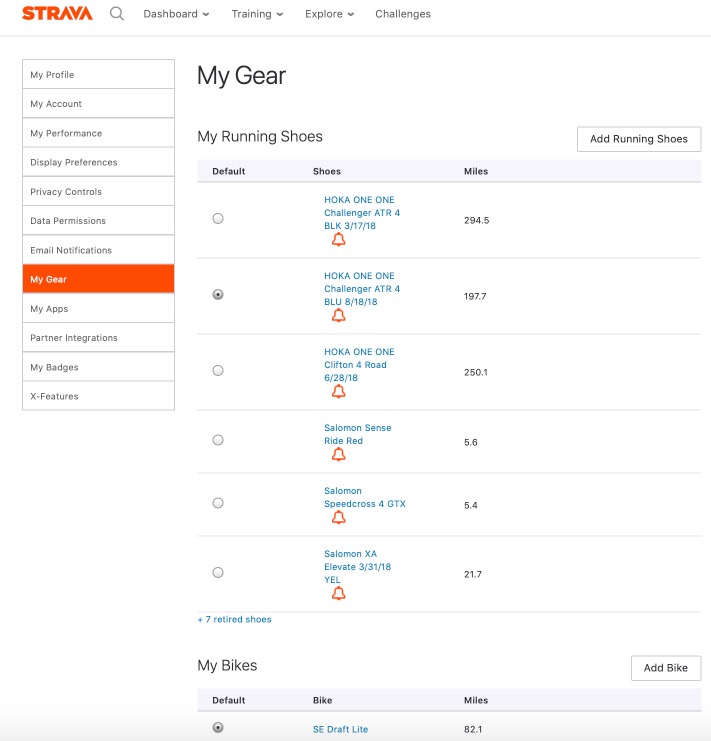
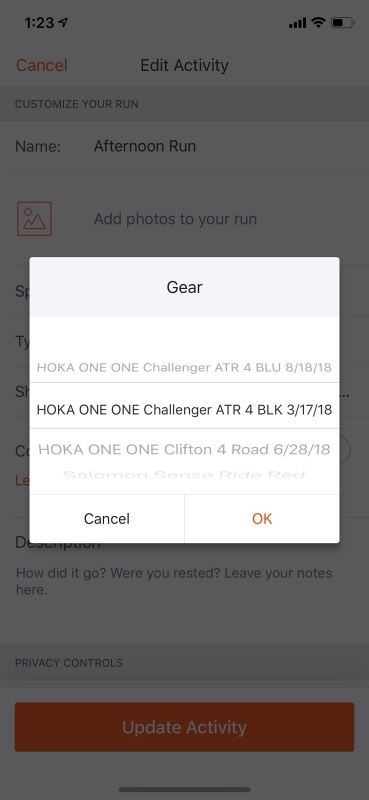
Click on ‘Add New Shoes’ to start the process. You can enter the brand, model, and your shoe’s mileage. Make sure to be as detailed as possible to help you track performance accurately.
Step 4: Save and Log Workouts
Once you’ve filled all required fields, don’t forget to save. Now, whenever you log a run, you can associate it with the shoes you’ve added. This allows easy tracking of total mileage per shoe.
Step 5: Review and Update Regularly
Regularly check your shoe mileage and update the information as needed. If you’ve switched to a new pair, ensure to add them to your profile to keep your tracking accurate.
Real-World Experiences: Shoe Tracking in Action
Many athletes report significant improvements in their running experience after they start tracking their shoes. Below are some case studies highlighting the benefits of integrating shoe tracking into a running routine.
Case Study 1: Julie’s Journey
Julie, an avid marathon runner, struggled with recurring shin splints. After adding her shoes to Strava, she realized her favorite training shoes had exceeded their recommended mileage. By switching to a new pair, her shin splints vanished, allowing her to train effectively.
Case Study 2: Mark’s Performance Boost
Mark, who was looking to improve his race time, started to track his shoe mileage after reading about it on Strava’s support forums. He discovered that his lighter racing shoes helped him shave off 5 minutes from his 10K time. The insights he gained helped him decide on shoe rotation strategies that improved his overall performance.
Comparing Popular Running Shoes for Strava Users
When it comes to running shoes, the options can be overwhelming. Here’s a comparison table of some of the most popular running shoes among Strava users, highlighting their pros and cons:
| Shoe Model | Weight | Cushioning | Durability | Best For |
|---|---|---|---|---|
| Brooks Ghost 14 | 10.4 oz | High | Durable | Long-distance running |
| Nike ZoomX Vaporfly NEXT% 2 | 6.6 oz | Moderate | Moderate | Race day |
| Hoka One One Clifton 8 | 9.4 oz | High | High | Cushioned runs |
| Asics Gel-Kayano 28 | 10.9 oz | High | Very Durable | Stability and support |
As you can see, different shoes serve different purposes. Make your selection based on your individual running style, terrain, and goals.
Top Tips for Managing Your Shoe Inventory on Strava
Mastering your shoe inventory can take your running game to the next level. Here are some tips to maximize the benefits of adding shoes to Strava:
1. Keep a Running Log
In addition to tracking shoe mileage on Strava, maintain a running log to note how each pair feels during specific runs. This will help you identify which shoes are best suited for certain conditions or distances.
2. Set Reminders for Shoe Replacement
Utilize Strava’s features to set mileage alerts so that you never forget to replace worn-out shoes. Regularly review your shoe mileage and the alerts to stay ahead.
3. Experiment with Rotation
If you have several pairs of shoes, try rotating them. Not only does this prolong the lifespan of each pair, but it also allows you to determine which shoes perform best for your specific training sessions.
4. Engage with the Strava Community
Share your experiences and seek advice from fellow runners about their preferred shoes. Engaging with the community can lead to discovering new footwear options that might suit your needs.
Pros and Cons of Tracking Shoes on Strava
As with any practice, there are pros and cons to tracking your shoes on Strava. Here’s a breakdown to help you evaluate if it’s right for you:
Pros
- Improved injury prevention by monitoring shoe mileage.
- Better performance insights based on footwear.
- Informed purchasing decisions for future shoes.
- Enhanced engagement with the running community.
Cons
- Requires diligence in updating shoe mileage.
- Can be time-consuming if you own multiple pairs.
- Some users may find it unnecessary if they prefer a minimalist approach to tracking.
FAQs About Adding Shoes to Strava
1. Is it necessary to add shoes to Strava?
While it’s not mandatory, adding shoes to Strava can provide valuable insights into your running habits, helping you improve performance and reduce injury risk.
2. Can I add multiple pairs of shoes?
Yes! You can add as many pairs as you like. This is especially useful for runners who train in different shoes for various purposes.
3. How do I know when to replace my shoes?
Most running shoes should be replaced after 300-500 miles. By tracking your mileage on Strava, you can determine when it’s time to shop for a new pair.
4. What information do I need to add shoes?
You’ll need the brand, model, and current mileage of your shoes. Strava allows you to add notes about your experience with each shoe as well.
5. Will tracking shoes affect my privacy on Strava?
No, shoe tracking is a private aspect of your account unless you choose to share this information with friends or the Strava community.
6. Can I track shoes on the Strava app?
Yes, you can add and manage your shoes directly from the Strava mobile app, providing easy access during your runs.
7. Are there any apps specifically for shoe tracking?
While Strava offers solid tracking features, there are stand-alone apps like ‘RunKeeper’ and ‘Nike Run Club’ that also provide shoe tracking options.
8. What if I lose track of my shoe mileage?
If you lose track, you can estimate using your running history or average mileage per week to get back on track with your shoe data.
9. Can I delete shoes from my Strava account?
Yes, you can delete shoes from your Strava inventory at any time, ensuring your records are up to date.
10. Do I need to pay for Strava to track shoes?
No, you can track shoes with a free Strava account. Premium accounts offer additional features but are not necessary for shoe tracking.